Ancient Cantonese barbecue techniques create rich, succulent pork under intensely savoury crispy crackling skin. A special occasion meal from my childhood.

Time: 4/5
Allow for an overnight marinade, and two hours in the oven.
Effort: 4/5
Takes some work but so, so worth it.
Better than Bacon
Cantonese roast pork, or Siu Yuk (燒肉; literally roast-meat) holds a very special place in my heart. Growing up, my father decided to make Siu Yuk the food of choice for my birthday. It turned into a habit, and as an adult I would sometimes buy Siu Yuk to celebrate special occasions.
Well made Cantonese roast pork really is a wonder to behold. It’s almost always made with the belly of the pig, so the meat is juicy and succulent from the fat. The skin, when properly roasted, turns into this airy and crunchy crackling. A good spice rub makes everything intensely savoury and aromatic, and everything comes together beautifully to become a perfect bite of heaven.
Cantonese roast pork belly is part of a greater family of Cantonese barbecue (燒味; siu-mei, roast-flavour) alongside roast duck, goose, and Char Siu (pork shoulder). The serious eateries would have their own massive kilns and roast their own meat on site. Cantonese barbecue pitmasters would come in at the break of dawn, roast the meat for the day, and get the rest of the day off – they were in demand enough that this would pay the bills.
Nowadays, most Cantonese barbecue comes from big food factories where restaurants buy it wholesale and reheat them before serving. Arguments for economies of scale and market efficiency aside, pre-made barbecue is missing some of the charm for me.
But I’m a grown man now, and nothing stops me from trying to recreate childhood joy in my own kitchen. While the results were not perfect, I think I got pretty close – a great run for my money, considering how I have no specialised equipment at all.

Posts since the last recipe that was actually served with rice: 0
The Science Behind Crispy Skin
Let’s go learn from the best and see what Kenji had to say about making crispy pork skin. The TL;DR version is that to crisp up the skin, three things have to happen:
- The connective tissue in the skin has to be denatured (broken down) by low-and-slow cooking;
- Water has to be forced out of the skin; and
- The denatured proteins in the skin have to be coagulated to maintain its structure.
If the environment is hot enough, steps 2 and 3 can happen together. Water turns into steam and stretches out the broken-down proteins so that they’re spread out in a thin layer. And because they’re spread thin, the proteins coagulate quickly and keep their shape. It’s almost like how baked goods get oven spring from a hot oven.
Achieving Crispy Skin
The skin makes or breaks a good Cantonese roast pork. It should have a glassy crunch without being dry or hard, and it should have the structure of small, tightly packed bubbles throughout the surface – almost like very fine bubble wrap. In order to achieve this, I make use of several tricks.
The first of which is to pre-blanche the pork belly, so I can poke holes into the skin to allow the marinade to penetrate better and help the fat render out. The second is to brush the skin with vinegar, so the acidity helps to denature the proteins. The third is to marinade the pork in the fridge overnight, uncovered, to start the dehydration process.
What I wasn’t able to do is to get the evenly distributed heat that I’d get from a commercial grade oven. Home ovens often have hot spots that cause parts of the skin to burn before the other parts can crisp up, so keep an eye on the pork and cover the at-risk bits with some foil.
For the minimal effort and equipment involved, this roast pork still turned out quite similar to the real deal – I’d say I got maybe 70% of the way there. And for a home cook, good enough is good enough.

Alternative to pork belly for making Siu Yuk
A word on the cut of pork to use: pork belly with the all-important skin is the most often used cut, as there’s plenty of fat to keep things juicy and it’s basically impossible to overcook the meat.
But it’s also very caloric, so if you’re looking for a more macro-friendly alternative then perhaps skin-on shoulder roast would be a low(er) fat option. But then, you’d have to deal with the bone. If I can find skin-on boneless pork shoulder, you can bet that the first thing I make with it will be some pork shoulder Siu Yuk.
Dramatis Personae
Served 6.
- 2lb boneless skin-on pork belly
- 2 tbsp salt
- 3 tbsp ground white pepper
- 3 tbsp five spice powder
- 1 tbsp rice wine vinegar
Served with some heavily sweetened soy sauce, and plenty of choisum.

Executive summary
- Place pork belly into a pot with cold water and bring to a simmer.
- Simmer pork for several minutes, then drain and allow to cool on a rack.
- When cool enough to handle, pierce the skin of the pork belly all over with a fork or a knife.
- Rub the pork belly all over with salt, white pepper and five spice powder. Brush the skin with vinegar.
- Refrigerate the pork belly overnight, uncovered, on a rack.
- To cook, preheat the oven to 180C/350F. Roast the pork uncovered for 1-2 hours until the skin is puffed up. In the meantime, make rice and vegetables.
- Cut the roasted pork belly into bite sized pieces. Serve hot.
Play by Play


Beginning with the pre-blanche. Larger pieces of pork might curl up less as it cooks, but I haven’t had the opportunity to find out yet. It’s done once the water comes to a simmer, and I can rinse the gunk off the meat.

While waiting for the water to come to a boil, I took the time to make the spice mix.


Once the pork is cool enough to handle, I poked holes into the skin with a fork. The rub goes everywhere, but vinegar only goes on the skin. After that, it’s overnight in the fridge on a rack so the belly can dry out a bit.

Here I am the next day. Pork into the oven with foil underneath, to catch all the lard that’s going to render out – do with that what you will. The meat is still on the rack to keep it off the roasting pan, because otherwise the hot metal acts like a skillet and burns the bottom before the skin is ready.


That leaves my hands free to make rice, cook the vegetables and make the sweet soy sauce while the pork is in the oven. The sauce is just a lot of sugar dissolves in a bit of boiling water, in a roughly one to one ratio with soy sauce.

Always wash your veggies! This is the dirt from just the first 300g of choisum.

Keep an eye on the pork, it may take anywhere from 1 to 2 hours depending on the size of the cuts and the peculiarities of your oven. Pull it out and let it rest when it looks gorgeous like this.

I cut my pork over some paper towels, because saturated fat is a bitch to clean off the cutting board.

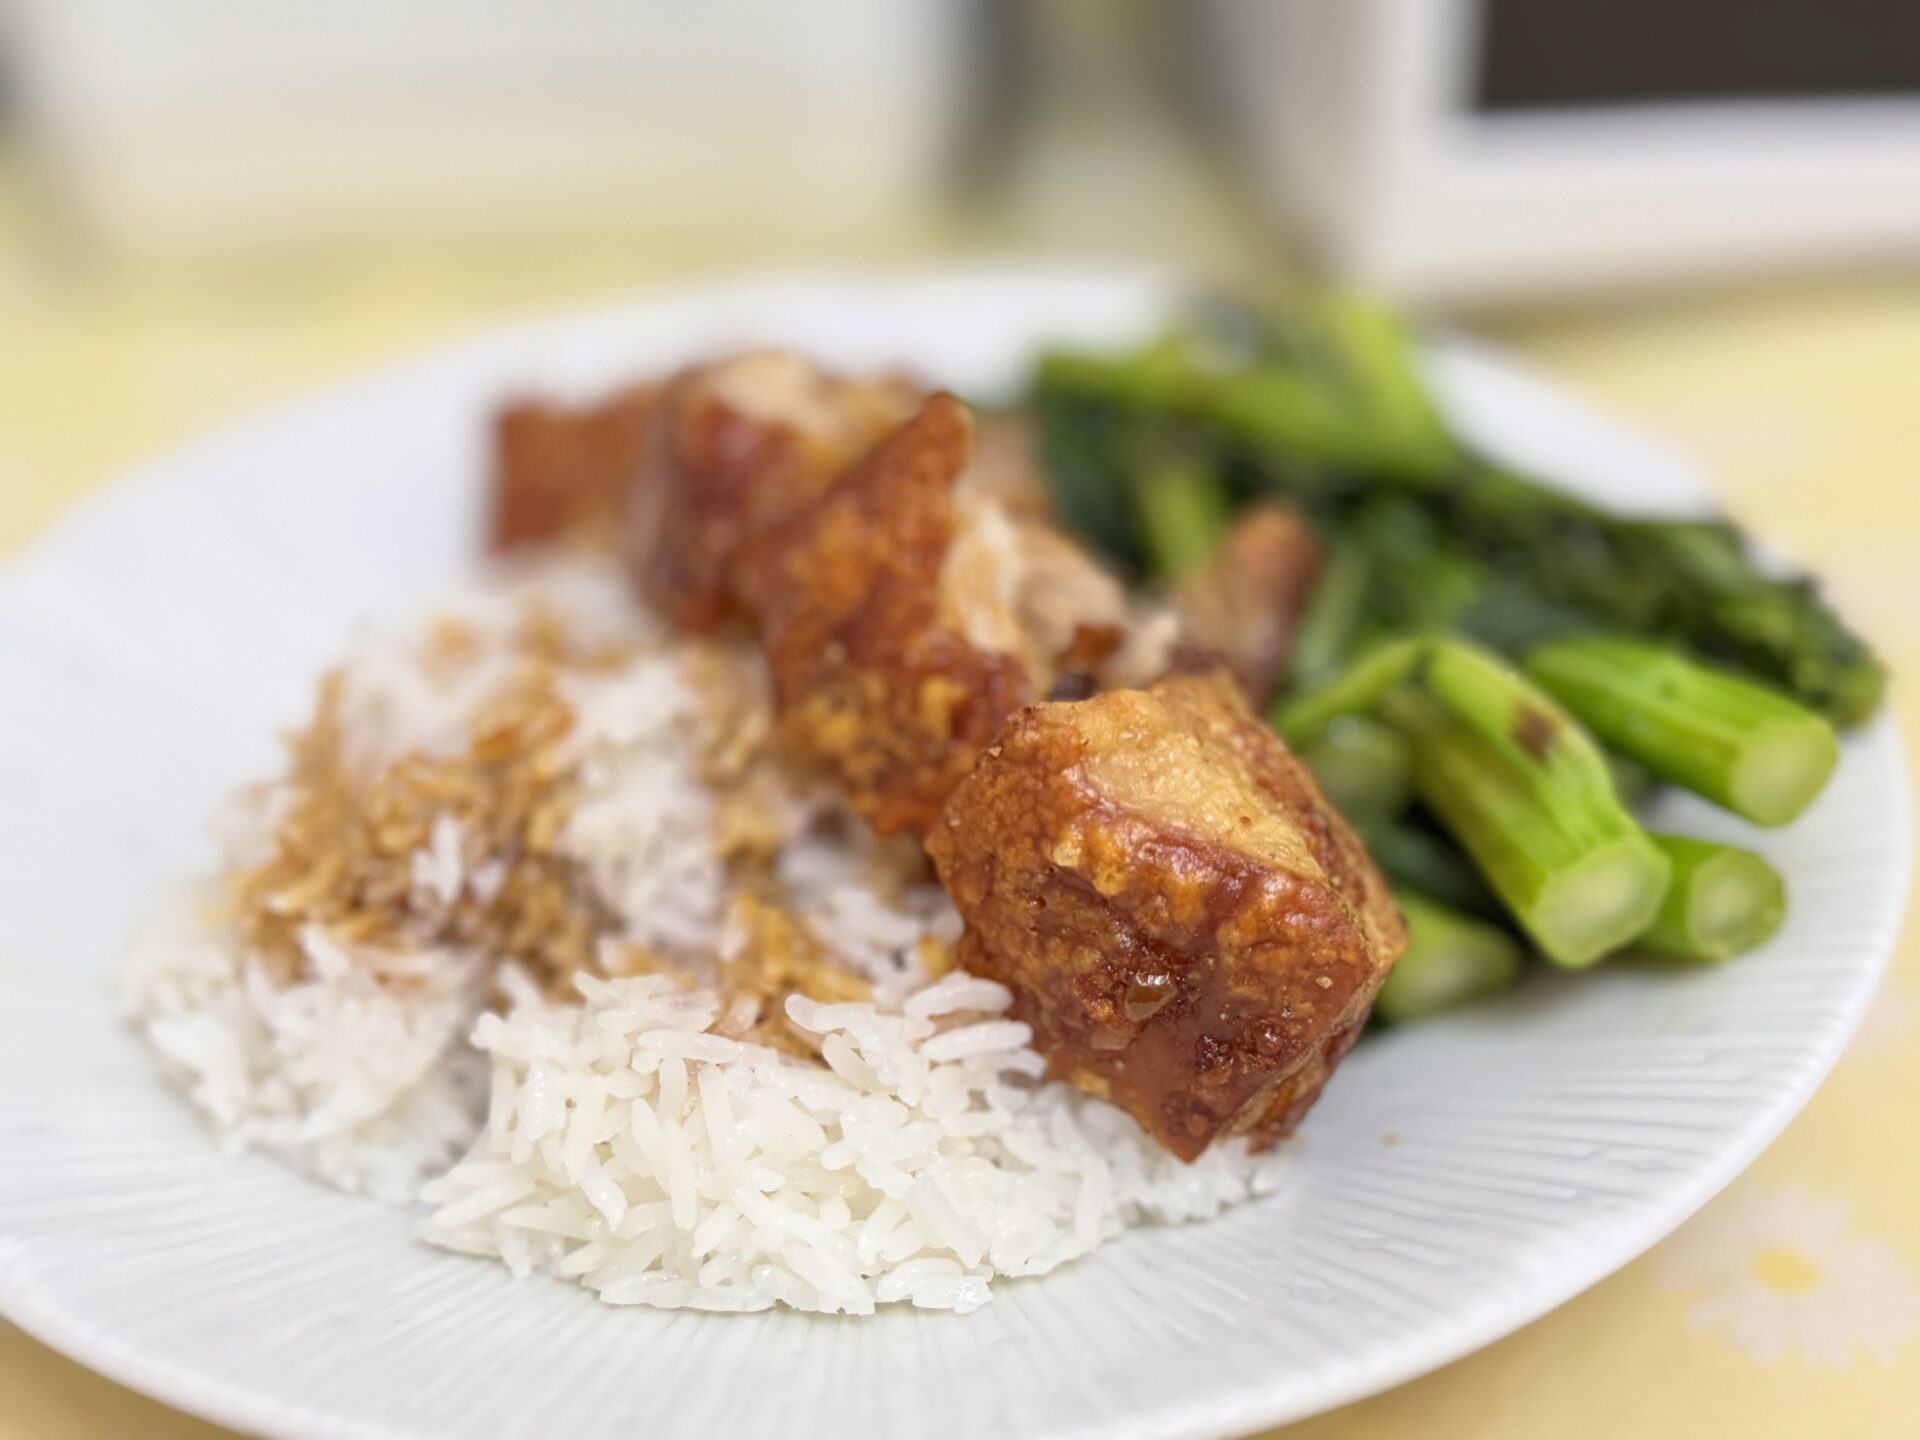
And it’s ready to serve! Crispy skin, succulent meat, rice drizzled with sweet soy sauce. It doesn’t get much better than this. Make sure to hang on to any leftover pork, for pork and tofu stew the next day.

Cantonese “Siu Yuk” Roast Pork Belly
Ingredients
- 2 lb boneless skin-on pork belly
- 2 tbsp salt
- 3 tbsp ground white pepper
- 3 tbsp five spice powder
- 1 tbsp rice wine vinegar
Instructions
- Place pork belly into a pot with cold water and bring to a simmer.
- Simmer pork for several minutes, then drain and allow to cool on a rack.
- When cool enough to handle, pierce the skin of the pork belly all over with a fork or a knife.
- Rub the pork belly all over with salt, white pepper and five spice powder. Brush the skin with vinegar.
- Refrigerate the pork belly overnight, uncovered, on a rack.
- To cook, preheat the oven to 180C/350F. Roast the pork uncovered for 1-2 hours until the skin is puffed up. In the meantime, make rice and vegetables.
- Cut the roasted pork belly into bite sized pieces. Serve hot.


Keep browsing by categories, or by tags:
Beef Blog Broccoli Cabbage Carrots Cast iron Cheese Chicken Curry Dashi Date Night Dried scallops Dried shrimp Eggs Fish and seafood Garlic Ginger Glass noodles Gochujang Honey Miso Napa cabbage Onion Oven Pasta Pork Potatoes Salmon Sesame oil Shiitake mushrooms Shrimp Soup Sous Vide Steaming Stewing Stir fry String beans Sweet potatoes Teriyaki Tofu Tomatoes Vacuum cooker Vegetarian Yogurt Zucchini