Save the carbs for dessert. Serve pork chops with a side of roasted cabbage and carrots for a diet-friendly date night dinner.

Time: 4/5
Plenty of downtime to get other things done.
Effort: 3/5
Just enough work to show off, but not enough to tire you out.
No carbs, no problem
Home cooking is a superpower that lets you create impressive experiences on a budget. Why pay for someone else’s overhead, rent and taxes when you can have a very nice meal for a third of the price? The better I get in the kitchen, the less often I go out for dinner.
Besides the cost savings, this superpower also lets you decide what goes into your meal. Make it taste however you want, make the portion sizes whatever you like. And for the fitness-minded among us, you get to decide what the macros are for the occasion.
By serving the protein with a double helping of oven-roasted vegetables, the main course remains substantial. I can then shift the carbs over to the dessert portion of the meal where they can make the most impact on my palate and the least effect on my waistline (in tonight’s case, these Bananas Foster Mini Crepe Bites). Carbs are delicious, and with some planning I can have my cake and eat it, too.
There isn’t anything groundbreaking about this recipe, but it’s a new way of thinking about special occasion meals. Think of it as a post describing a proof of concept. All the other usual date night tricks come into play here. The sous vide and the oven are both set-and-forget appliances that save me the stress of having to time something perfectly, and leave my hands free to make the other components of the meal.
And that’s how I like my date night dinners: stress-free, guilt-free, and a bit more elevated than the usual weekday fare. Much like steaks served on some make-ahead Parmesan pumpkin puree.

Posts since the last recipe that was actually served with rice: 1
Dramatis Personae
Served two.
2x 150g Bone-in pork loin chops
These were going for less than USD$4 for three pieces during the clearance sale, and I’m super proud of having grabbed a ton of them before the sale ended. They served as the centerpiece of many a date night dinner, and I’m a bit sad to use the last of them.
This is a pretty lean protein, so it’s tricky to cook them properly on the stove or in the oven without drying them out. Fortunately, sous vide is pretty foolproof, so they go into the water bath at 60C/140F for 90 minutes straight from frozen (food god Kenji does it too, and there’s much less of a mess from floppy meat and raw juice that way).
There’s no need to marinade. Just salt and pepper the frozen pork chops right inside the sous vide bag. There’s plenty of time for the seasoning to work it’s way through the meat as it defrosts and cooks.
Aromatics
A couple cloves of garlic and several sprigs of fresh thyme go into the sous vide bag, so the flavour can permeate the meat as it cooks. These also come in handy when making the pan sauce later on.
Pan sauce
Basically the fond from searing the pork chops, deglazed with a bit of water, plus the juices and aromatics from the sous vide bag. I reinforced mine with a teaspoon each of lemon juice and Better than Bouillon, and thickened it with a cornstarch slurry – a more calorie conscious method than a traditional roux.
Vegetables
Always eat your veggies! A 600g half-head of cabbage and a large 300g carrot should be enough to make this a substantial yet surprisingly low-calorie main course.
These get washed, peeled, and coated in olive oil before being salted, peppered and garlic powdered before being roasted, flipping halfway. I did mine for 30 minutes at 200C/400F, but they came out with a bit less char than I would like; you might want to try 230C/450F for 30 minutes instead.

Executive summary
- Sous vide pork chops at 60C/140F for 90 minutes.
- 40 minutes before serving, start preheating the oven to 230C/450F with a foil-lined baking tray inside.
- Peel and roughly chop the carrot. Slice cabbage into thick wedges, leaving the core intact.
- Line the foil-lined and preheated baking sheet with parchment paper. Place vegetables onto the preheated baking sheet, brush with oil, then salt and pepper.
- Roast vegetables for 30 minutes, flipping halfway.
- After the halfway flip, remove the pork chops from the sous vide water bath. Pat dry and sear on all sides.
- Deglaze the pan with the juices and aromatics in the sous vide bag, and stir in a teaspoon of Better Than Bouillon. Taste and adjust for seasoning, thicken with a corn starch slurry if desired.
Play by Play


Last things first. The pork and the aromatics go into the SV bag, still frozen. I haven’t defrosted any protein intended for the SV ever since I discovered this trick, and I don’t think I’ll go back – no spills, no frills.

This will take the longest, so once this is set up I can take my time with the rest of the meal. There’s a good 45 minutes or so before I need to get started on the vegetables, so I might get some chores done. If this was a serious fancy date night, this time window would be the opportunity to make dessert.


45 minutes out, and it’s time to get started with the vegetables. Preheat the oven while you wash and cut. Make sure to leave the cores on the cabbage, so the leaves stay together in a wedge. Once the vegetables are oiled, salted and peppered, they can go in the oven.

Here we are, after 15 minutes of doing some dishes and wiping down the counter. The vegetables are about halfway done, and I gave them a flip. There’s some char developing, especially on the right side where my oven is hotter.


Once the vegetables are flipped, there isn’t much to do besides searing the pork chops. Extract them from the bag and pat them dry, and save the juices for making the pan sauce later.

Don’t forget to sear the fat cap on the side as well! The cast iron really is the best task for this, since you can preheat it forever and get it ripping hot. The pork is already at the target temp from the sous vide, so I want to spend as little time as possible developing colour on the surface.

Reserve the pork once seared, and deglaze with a splash of water plus the SV juices. Simmer and reduce, while you adjust the seasoning – a squeeze of lemon juice, some Better than Bouillon, thicken with corn starch slurry as desired. I don’t mind the coagulated protein clumps, but you could skim those off if you want a smoother presentation.

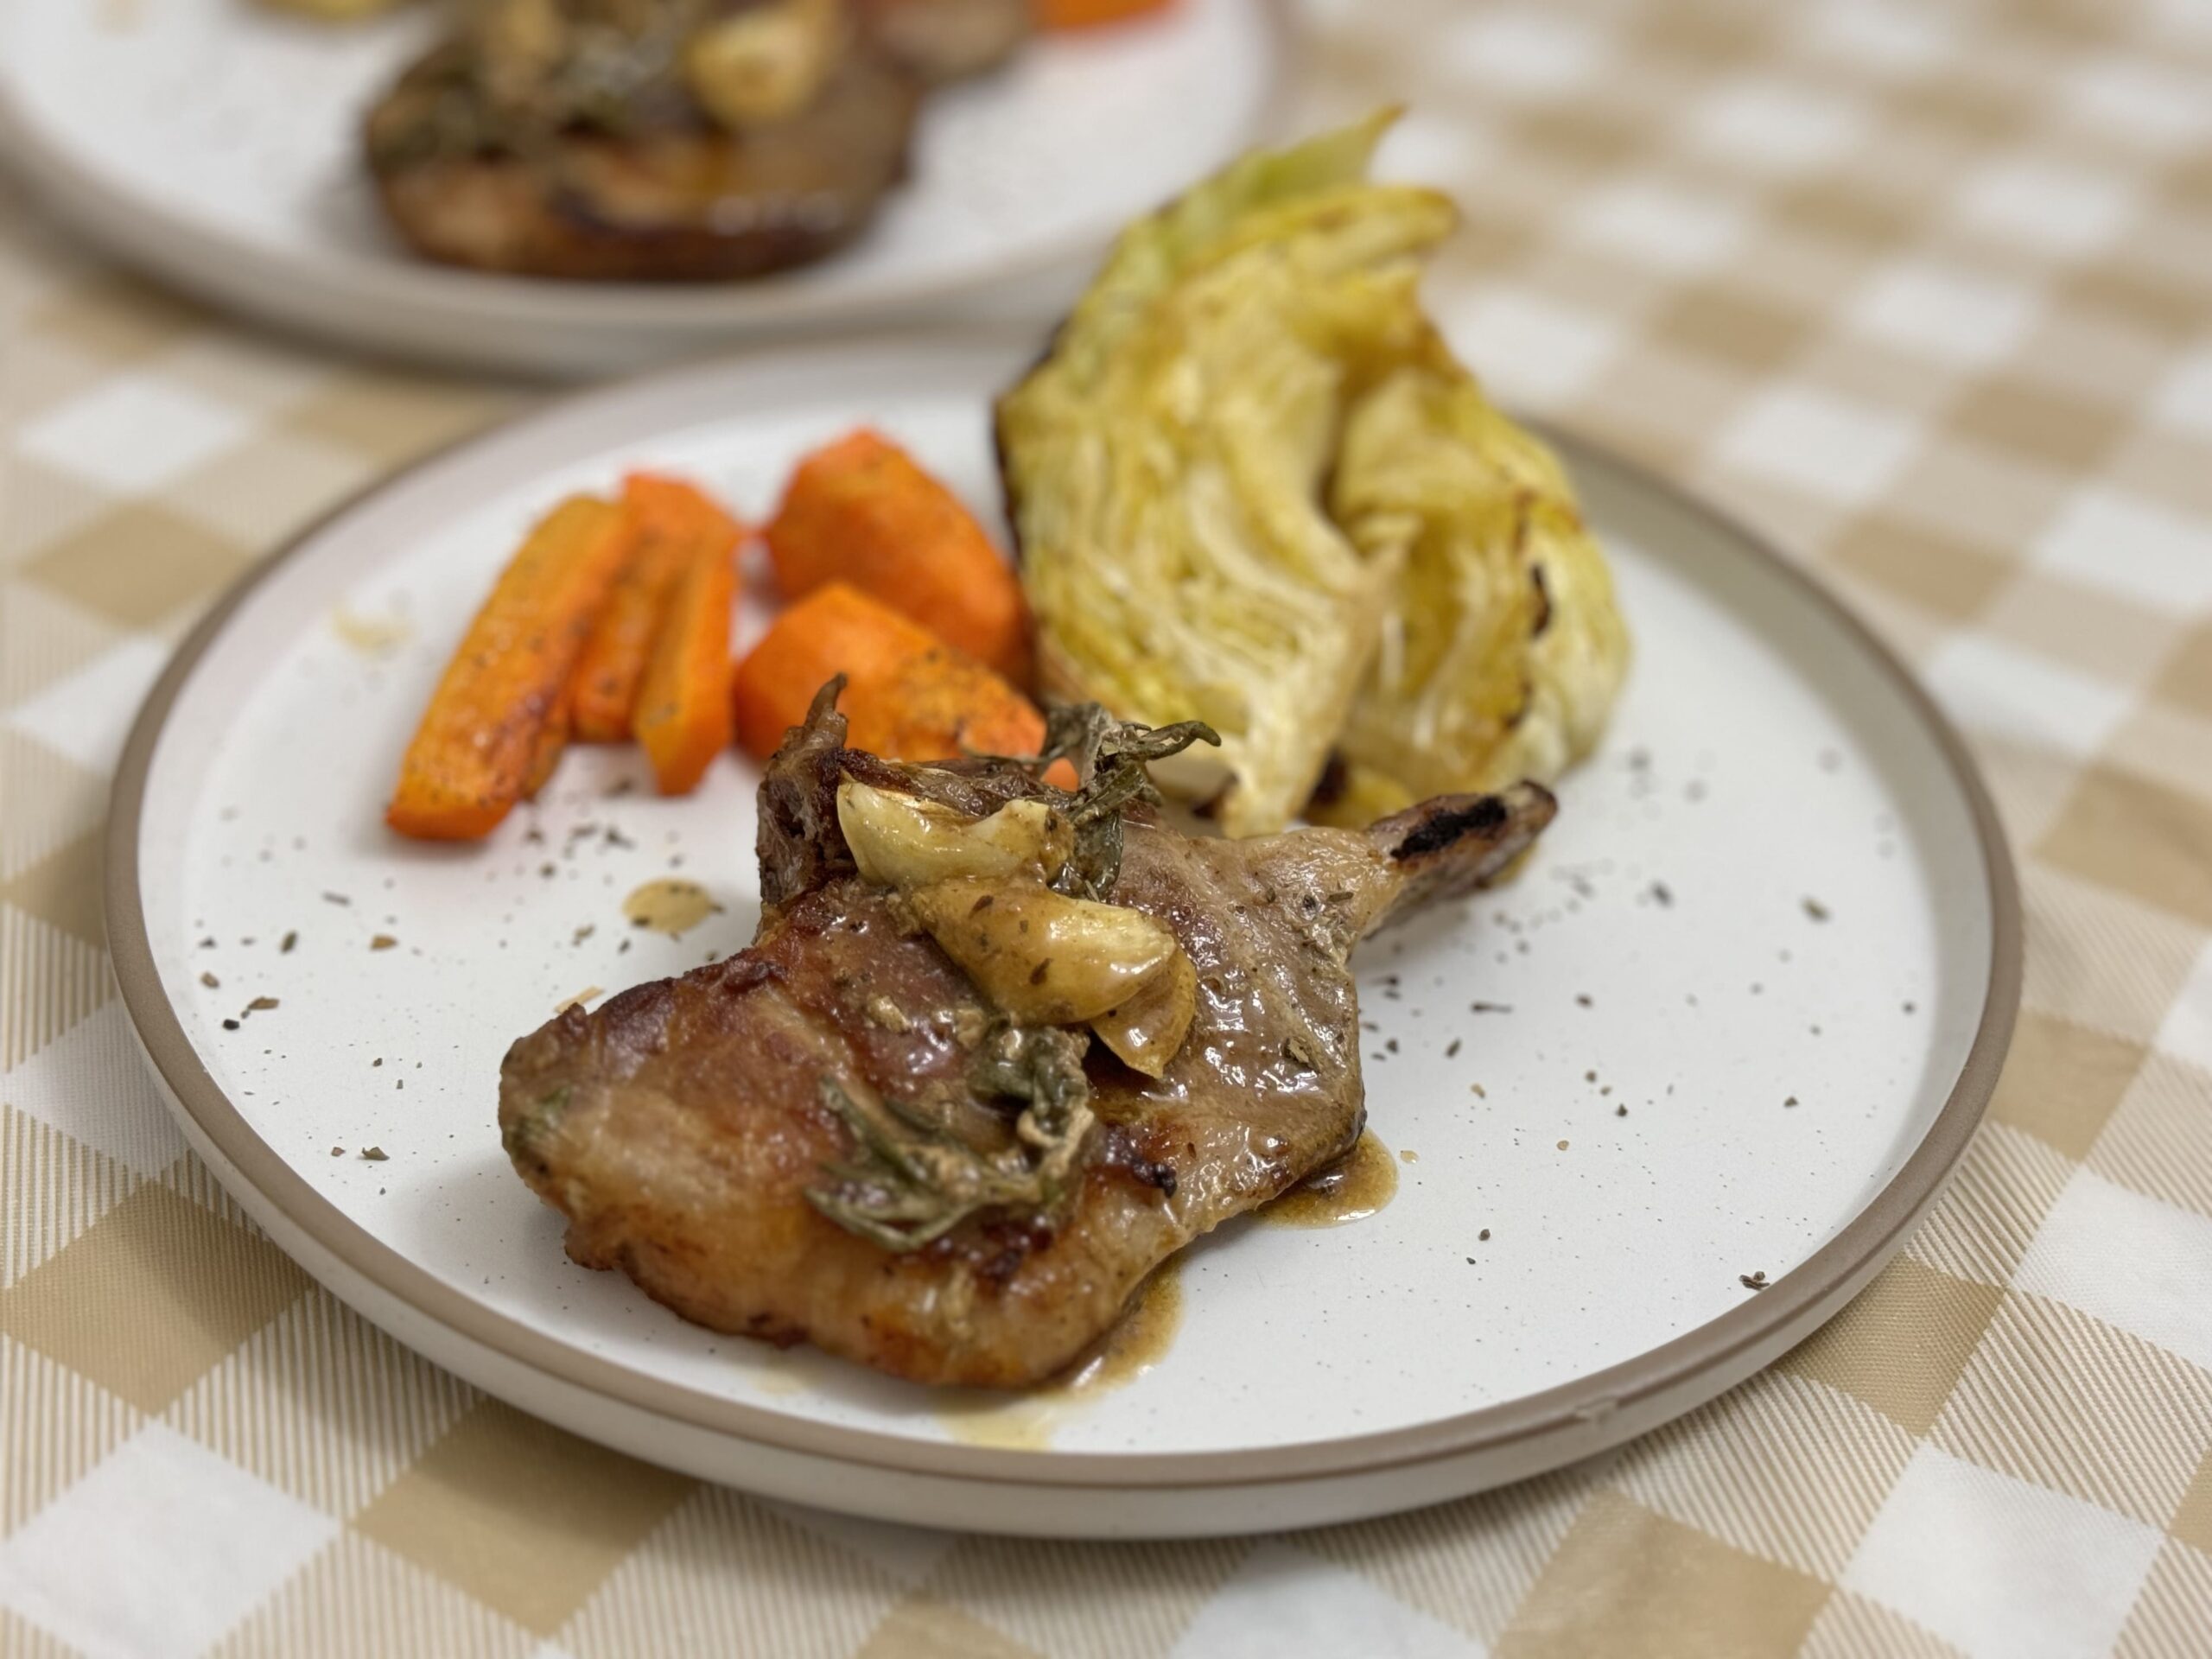
The vegetables are ready and waiting in the oven, so all there is left to do is to plate up and enjoy! I like the rustic presentation of placing the aromatics on top of the pork, and you can’t really see the protein clumps. A scattering of dried herbs helps break up the monotony of the empty spaces on the plate (and don’t forget, pretty food tastes better).

Nailed the temperature. Sous vide, fool proof, every time.

Diet-friendly Date Night: Pork Chop And Roasted Cabbage
Ingredients
- 2 150g pork loin chops
- Several cloves of garlic
- Several sprigs of thyme
- 1 tsp lemon juice
- 1 tsp Better than Bouillon
- 1 tsp corn starch
- 600 g cabbage
- 300 g carrots
- 1 tbsp olive oil
- Salt and pepper to taste
Instructions
- Sous vide pork chops with salt, pepper, garlic and thyme at 60C/140F for 90 minutes.
- 40 minutes before serving, start preheating the oven to 230C/450F with a foil-lined baking tray inside.
- Peel and roughly chop the carrot. Slice cabbage into thick wedges, leaving the core intact.
- Line the foil-lined and preheated baking sheet with parchment paper. Place vegetables onto the preheated baking sheet, brush with oil, then salt and pepper.
- Roast vegetables for 30 minutes, flipping halfway.
- After the halfway flip, remove the pork chops from the sous vide water bath. Pat dry, and sear on all sides.
- Deglaze the pan with the juices and aromatics in the sous vide bag, and stir in a teaspoon of Better Than Bouillon. Taste and adjust for seasoning, thickening with a corn starch slurry if desired.
- Assemble and serve.


Keep browsing by categories, or by tags:
Beef Blog Broccoli Cabbage Carrots Cast iron Cheese Chicken Curry Dashi Date Night Dried scallops Dried shrimp Eggs Fish and seafood Garlic Ginger Glass noodles Gochujang Honey Miso Napa cabbage Onion Oven Pasta Pork Potatoes Salmon Sesame oil Shiitake mushrooms Shrimp Soup Sous Vide Steaming Stewing Stir fry String beans Sweet potatoes Teriyaki Tofu Tomatoes Vacuum cooker Vegetarian Yogurt Zucchini