Proper technique and equipment elevates simple chicken thighs into a devastatingly delicious dinner, with some savoury and shatteringly crispy skin.

Time: 2/5
Fridge to table in 30 minutes
Effort: 3/5
Not really that hard to cook, but I’m giving points for pan maintenance
Cast Iron Debut
I couldn’t wait to try out my new cast iron pans. I set to work seasoning them the first thing when I got back home, and went out again for groceries as soon as they went into the oven.
I was looking for a simple recipe, for a no-fuss ingredient that I was already familiar with, in order to fully appreciate what the cast iron skillet brought to the table. Something for which the high heat capacity and thermal conductivity of the pan can really shine.
I found what I was looking for in some chicken thighs. The skin was just waiting to be turned brown and crispy by a nice hard sear. There would probably be fond left at the bottom, so I had the chance to practice making a pan sauce. And although the thighs I got were small enough to cook all the way on the stove, I could transfer the pan into the oven to finish roasting if need be.
With all these new techniques and equipment on my mind, I was excited about this first foray into what I always thought of as real, fancy pants Western cooking. While not everything turned out the way I hoped (hit me up if you have any tips for creating a successful cream sauce), I was still very happy with the results.
2024 update: I’m happy to report that I did go on many more wonderful adventures with my cast iron skillets. From Mayo Fried Chicken optimised to minimise cleanup, to Steak Fajitas, to these date night bone-in loin chops.

Dramatis Personae
Chicken – 100-200g pax
As usual, I went with boneless skin-on chicken thighs. They happen to be the cheapest chicken I could get from my grocery store. Even though I know the bone brings flavour, I prefer the convenience of boneless.
The skin, the crisping up of which is the main goal of this endeavour, is of course indispensable.
They would taste better if salted a few hours ahead of time ( what fancy folks call dry brining), but for a weeknight affair it is perfectly adequate to salt and pepper them right before or during cooking. The savouriness that comes from a good sear more than makes up for any losses from seasoning in advance.
Of course, you can substitute chicken thighs for any protein that is improved by crisping up. This fellow Kodi at Cooking to Entertain has this impressive Garlic and Rosemary pork chops that also make good use of the properties of cast iron.
Pan sauce
My first attempt at a Western-style pan sauce. Shallots sautéed in pan drippings, then white wine to deglaze. Chicken broth after the wine is reduced, then finish with a splash of cream which hopefully emulsifies with the help of a dash of mustard.
You may have seen from the picture earlier how that turned out – things went fine up until I added the cream, after which I was unable to create an emulsion. That aside, it was a delicious sauce nonetheless, and I’m closer to a successful attempt than I was before.
Sides
I picked up two pretty big cabbages for ridiculously cheap because the market stalls were closing. This is often how I decide what to cook. A lot of veg, enough to supply the next batch of meal prep, for literally less than it costs to ride the train to work. Since I was expecting some bold flavours from the chicken, I kept it simple and seasoned the cabbage simply with some salt.
Cabbage on a plate isn’t exactly the most visually striking, though. To give the meal some colour as well as some acidity and freshness, I made a tomato salad / salsa type thing by tossing it with diced shallots, vinegar, olive oil and salt and pepper. It was surprisingly good for how simple it was, and reminded me on the pleasures of simple things done well.

Executive summary
- Make rice. Dice shallots, reserving some for the pan sauce. Toss the rest in a bowl with diced tomatoes, vinegar, salt and pepper. Keep the fridge and develop flavour.
- Cut cabbage into shreds. Stir fry in wok with a bit of oil and salt and reserve.
- Preheat cast iron skillet on medium-low, with a bit of oil. Salt and pepper both sides of the chicken thighs. Lay thighs in pan skin side down
- After 7 or 8 minutes, or when the thighs release easily, flip and sear the other side as well.
- Admire the golden brown skin on the thighs while readying shallots from earlier, white wine, chicken broth and cream.
- Reserve chicken once well browned and cooked through. Drain excess fat, then sauté diced shallots.
- Add in white wine, reduce by about half. Add chicken broth and a bit of mustard, stirring to combine.
- Finish sauce with a splash of cream, taste and adjust for seasoning. Serve.
Play by Play

Dicing up the tomatoes and the shallots. I’ll be using shallots for the pan sauce anyway, so might as well dice some extra. This was one tomato and two shallots, to be split between salad and sauce for two.

Salad components salted, peppered, vinegar-ed and olive-oiled to taste. It goes into the fridge where the flavours can develop while I make the rest of the meal.


Cabbage for days. I like cabbage cooked until pretty soft, and when prepared that way overcooking isn’t really a concern. That affords me the luxury of shredding them half a head at a time, and adding to the wok as I go. This is the sort of opportunistic prep that saves me a lot of work later in the week.

Cast iron skillet on medium-low heat, chicken in with a bit of oil. Medium-low, because I want the skin to be crisp rather than burned by the time the whole thing is cooked through. My thigh pieces were pretty small, so I chose to cook them all the way on the stovetop. Watch the white creep up the sides of the meat to guesstimate when it is time to flip. In my experience the edges cook faster than the center, so to play it safe flip when the whites reach about 70% of the way up.

This is the moment I fell in love with this pan. That intense and even browning is something I was never able to achieve in my decade of searing chicken in nonstick skillets. I got my pan sauce ingredients together as I let the chicken cook on the other side.


The schmaltz rendered out from the chicken has been drained and reserved for delicious future purposes. Whatever drippings and fond on the bottom of the pan now form the basis of the pan sauce. There was plenty of residual heat in the pan, and the wine reduced quickly. I was hoping a bit of mustard would help hold my sauce together when I add the cream, but then …

This was when things went wrong with my sauce. The cream split as soon as I tried to stir it in, and I was left with a cloudy sauce rather than a thick and smooth one like I hoped. I thought I did everything right too – adding the cream with the heat off, having the mustard there as an emulsifier. Fortunately, all it did was hurt the appearance and the mouthfeel, and the sauce was delicious nonetheless.

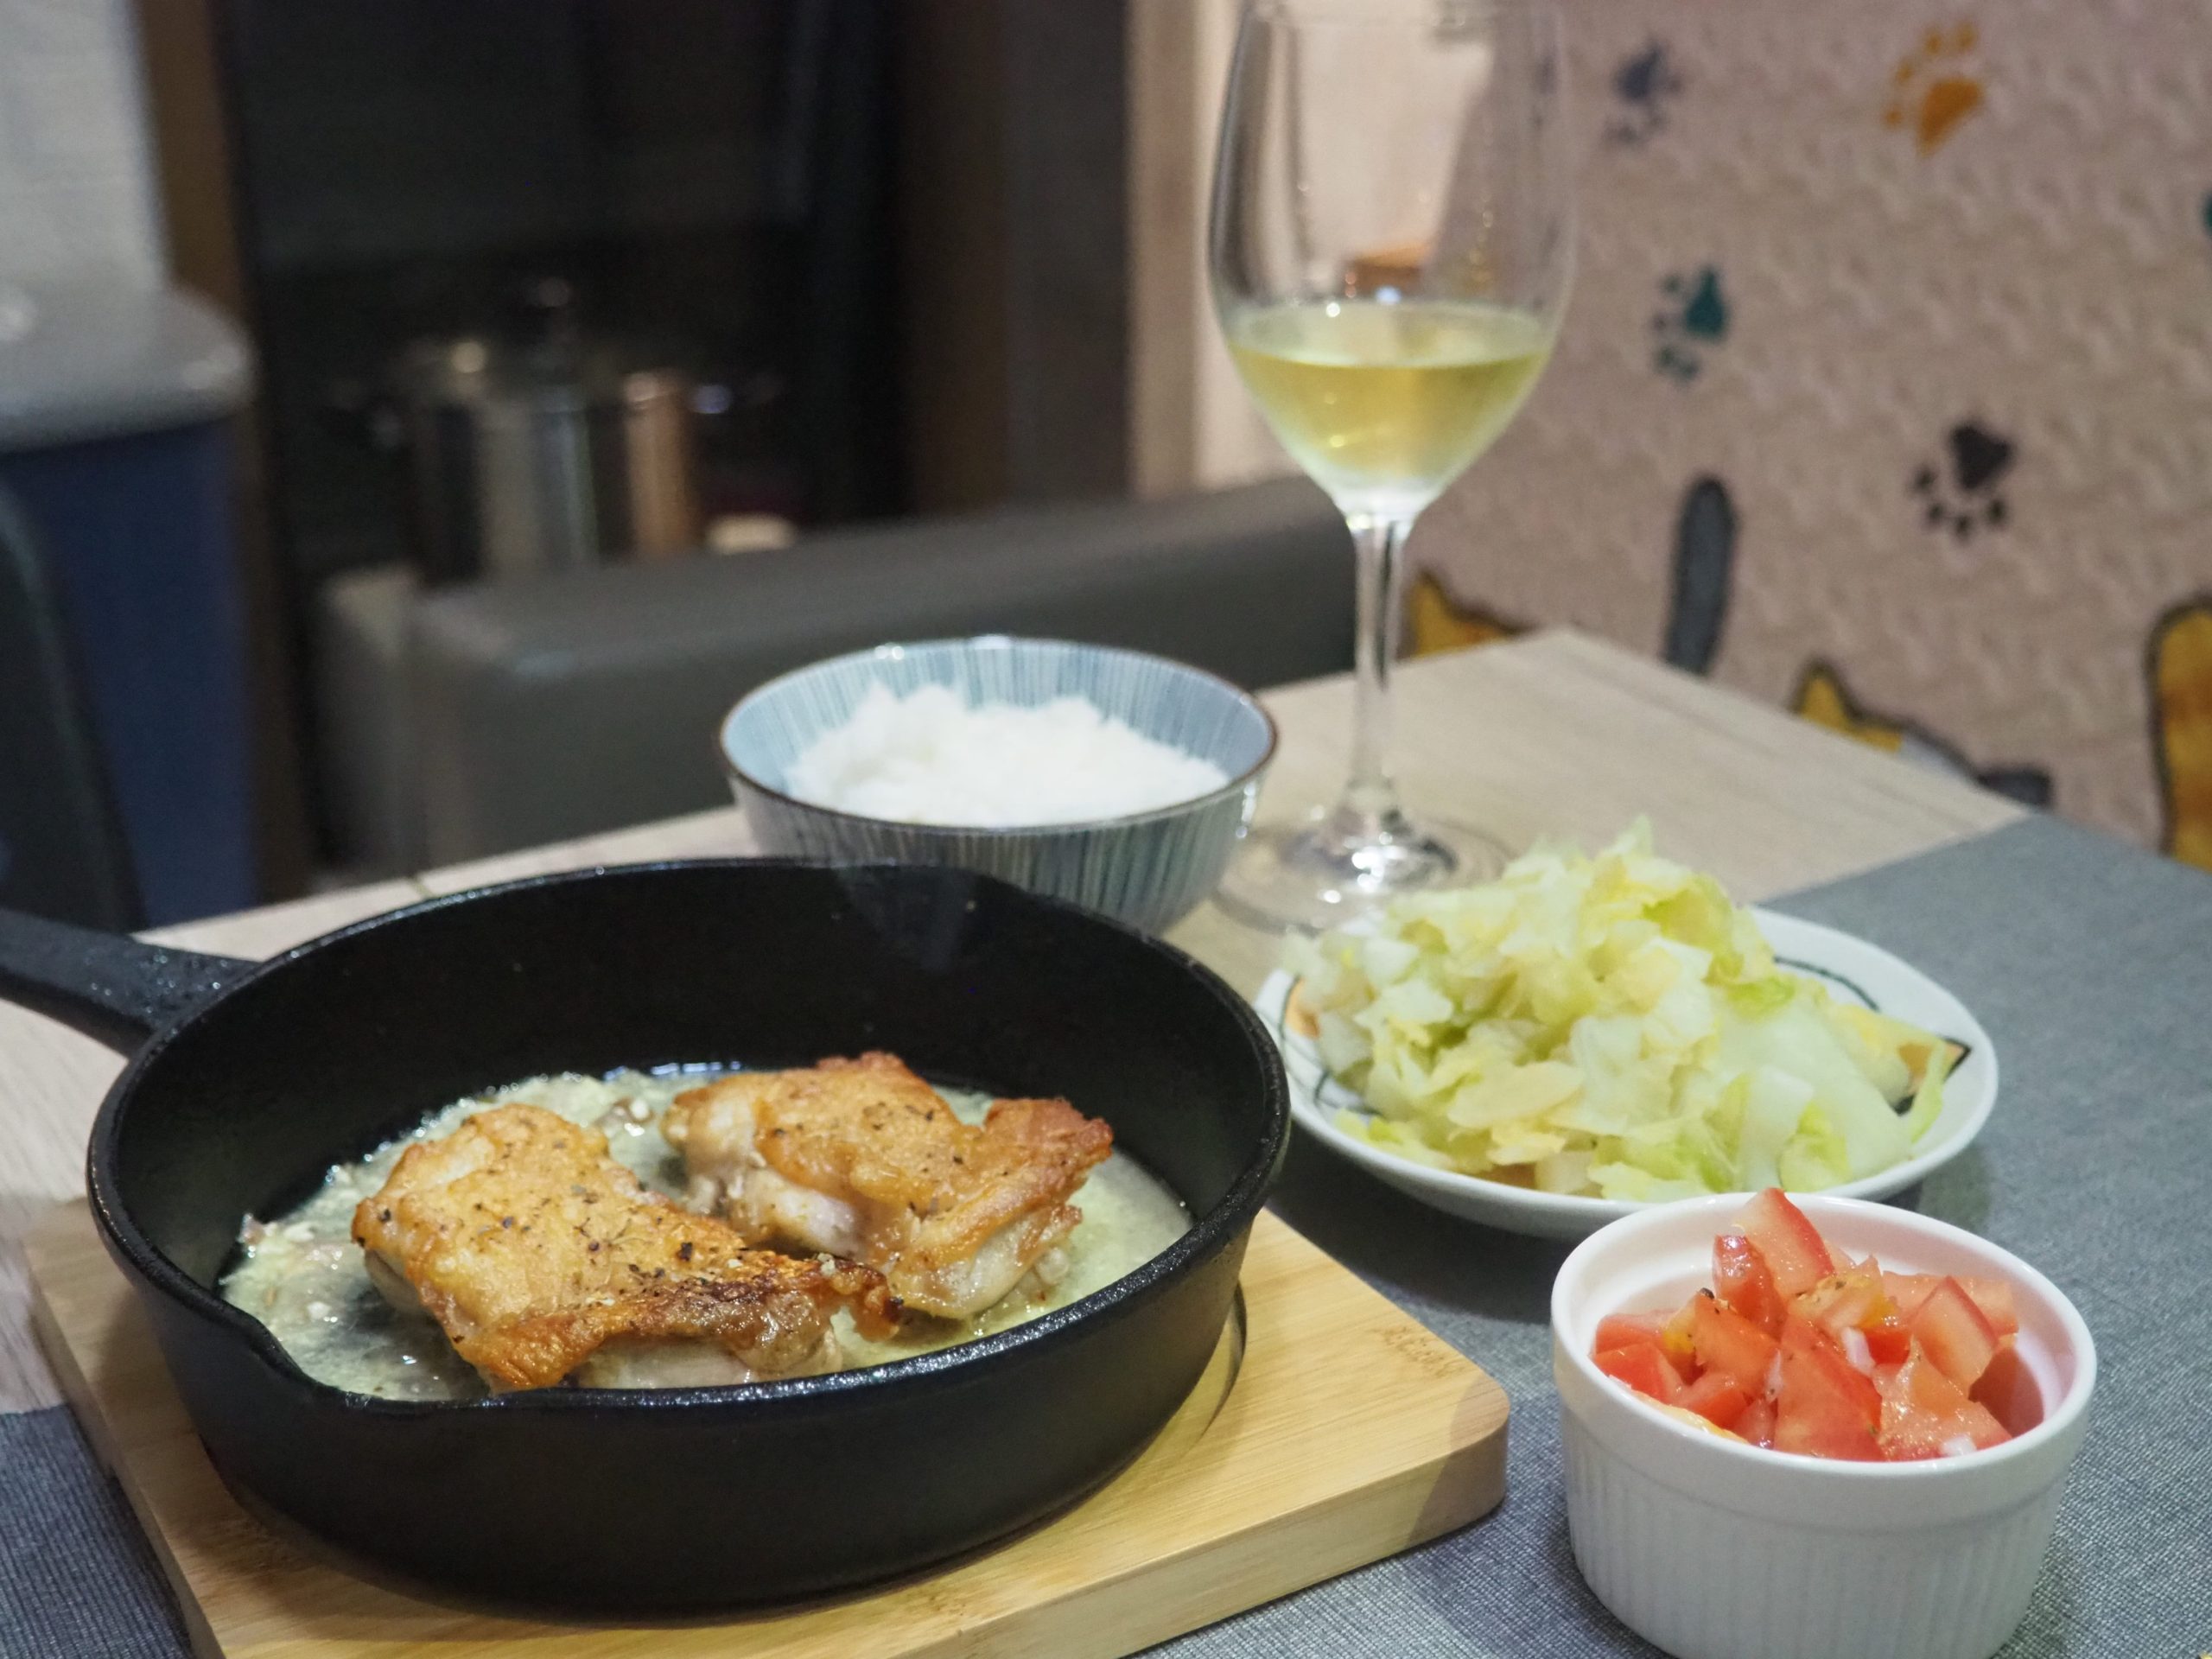
Laying out the table all pretty-like, putting some lessons learned earlier to good use. I got these smaller 7-inch skillets because they were the biggest that could fit in my oven, and they turned out to be really nice for serving the chicken in individual portions while keeping them warm.

Fork don’t lie.

Pan Seared Chicken Thighs
Ingredients
- 2 boneless skin-on chicken thighs
- Salt and pepper to taste
Pan sauce
- 1 shallot finely minced
- 50 ml white wine
- 100 ml chicken broth
- 1 tbsp cream
Instructions
- Preheat cast iron skillet on medium-low, with a bit of oil.
- Salt and pepper both sides of the chicken thighs. Lay thighs in pan skin side down
- After 7 or 8 minutes, or when the thighs release easily, flip and sear the other side as well.
- While waiting for chicken to sear, prepare shallots, white wine, chicken broth and cream.
- Reserve chicken once well browned and cooked through. Drain excess fat, then sauté diced shallots in the same pan.
- Add in white wine, reduce by about half. Add chicken broth and a bit of mustard, stirring to combine.
- Finish sauce with a splash of cream, taste and adjust for seasoning. Serve.


Keep browsing by categories, or by tags:
Beef Blog Broccoli Cabbage Carrots Cast iron Cheese Chicken Curry Dashi Date Night Dried scallops Dried shrimp Eggs Fish and seafood Garlic Ginger Glass noodles Gochujang Honey Miso Napa cabbage Onion Oven Pasta Pork Potatoes Salmon Sesame oil Shiitake mushrooms Shrimp Soup Sous Vide Steaming Stewing Stir fry String beans Sweet potatoes Teriyaki Tofu Tomatoes Vacuum cooker Vegetarian Yogurt Zucchini