Clay pot rice combines savoury toppings, a crusty bottom, and fluffy rice into a warming, comforting cold weather meal.

Time: 3/5
2 if you multitask, but I haven’t reached that level yet
Effort: 3/5
Involves alternating between watching the clock and moving quickly
Bottoms up
Every culture has its cold weather food, and clay pot rice is that food for me. The very mention of it conjures up memories of going out to the outdoor food stands that spring up by bus terminals, steam billowing from rows upon rows of clay pots sitting atop gas stoves.
The cook masterfully manoeuvres each clay pot through their various stages in a maelstrom of orchestrated chaos. This new order goes on the heat. That order is ready to serve. It’s time to add the toppings to this serving, but that pot is on the verge of burning! The cook’s cigarette rests serenely between his lips as his hands dance around his workspace nonstop.
The plastic stool you’re sitting on has a big gash down one leg, it creaks whenever you shift around your seat. Your order arrives. The clay pot is set in front of you, on a wobbly folding table. As you open the lid, your face is warmed by a stream of hot air that jumps out of the pot and brings the delightful aroma of freshly cooked rice to your nose.

The most important part of a clay pot rice is the crusty bottom that forms in the bottom, like the socarrat in a paella. It’s called the 飯焦 (faan jiu / fan jao) – literally, burnt/crispy rice. Together with several variations in topping combos, clay pot rice combines tastes, textures, sights and smells into a one pot meal.
This winter, two clay pots entered my possession. I ordered clay pot rice for dinner, but noticed that this particular shop let people order it as takeaway, if I pay a small deposit that would be returned if I brought the pot back. It didn’t take long for me to figure out that the deposit costs less than buying a clay pot outright.
I am ashamed to admit that, for all the rice I eat, I don’t know how to cook rice if I don’t have a rice cooker. I even find myself relying on the markings on the side of the cooker pot to measure out how much water I need. My ability to eyeball the amount of water using the pinky method is atrophying from disuse.
The serendipitous addition of two clay pots to my arsenal became an impetus for me to step up my rice-cooking game. After doing some reading up, I was ready to try cooking rice in a pot, beginning with a relatively simple beef and egg topping combo. Other classic toppings include chicken with Chinese sausage, dried duck legs and dried pork belly, pork ribs and chicken feet, meatloaf, frog legs (don’t bash, it’s delicious and I love it), and eel.
Please note that the times provided for this recipe are even more of a suggestion than they usually are on this website, because they will vary wildly according to the size of your pot, amount of rice, amount and type of toppings, the distance between the pot and the heating element, how old your rice is … etc.
It’s much better to cook by eye, so look at the photos for visual reference. Although, having said that, you want to avoid opening the lid and letting steam escape unless absolutely necessary. The art of making clay pot rice lies in mastering this paradox. Don’t expect to nail this on your first try, but you will get better with practice. I know I did.

Dramatis Personae
Rice – about 100g uncooked pax
The star of the show. Jasmine rice is the most commonly used, although short grain rice might also work. You’ll need a 1:1 ratio of rice to water by volume, or maybe slightly more water than rice.
This cup came with my rice cooker, and I guard it jealously because I can’t find it sold individually anywhere else.

I grew up thinking this was “one cup” because it’s how rice is measured, and rice is the thing that got measured the most frequently in the house. One scoop weighs around 150g and feeds about two people when cooked.
It took me more than a decade in the kitchen to finally have a reason to look at it closely and find out that, in fact, it’s about 3/4ths of a standard cup. Better late than never, I guess.
Clay pot
Best supporting actor. These take time to heat up, but they stay very hot for a long while. This is great for keeping your dinner warm as you eat, but take a tip from me and let them cool down for some time off the heat before serving because mine was hot enough to damage the heat-proof mat I set them on.
The clay pot is not just for appearance. The rounded bottom lets you heat the sides by tilting the pot, so you get more of the crispy rice bottom. However, you could adapt the technique for a round-bottom wok, a wide skillet or a paella pan with reasonably similar results as long as you have a well-fitted lid.
Beef – 100g pax
Cut into thin pieces and marinated simply with some oyster sauce and soy sauce. I think mine is sirloin, but I’m not sure (no pun intended). Any tender cut that you would conceivably use for steak would work.
We’re steaming the beef gently to make sure they stay tender, so there isn’t much heat going around. Be conservative about the amount, and slice it thin.
Others
A drizzle of soy sauce really makes the flavours pop. Some vendors make their own proprietary blends with sugar and scallion oil and what not. The additions are good, but not worth the effort for a weeknight dinner.
An egg is always nice for colour and textural contrast.
Garnishes include julienned ginger and chillis, as well as scallions cut into segments. They really add to the aroma of the recipe, and I highly recommend their inclusion.
Vegetables
Always eat your veggies! I went with 菜心 (Choi sum / Cai xin) because they’re in season during the winter. The cold weather harvests taste sweeter than the other times of the year. Allow 100-150g per serving. I tried to steam them in the clay pot as well, but the pot wasn’t big enough so I stir fried mine with some salt and a little bit of Chinese rice wine instead.
Executive summary
- Marinade beef, ideally the night before or morning of cooking.
- Lightly oil the insides of each clay pot with a paper towel.
- Wash rice, and add to clay pot along with an equivalent volume of water.
- Cover and bring to a boil over high heat. Once water is boiling vigorously, turn the heat down to as low as it will go and cover.
- Set a timer for 8 minutes. Tilt the pot on 4 imaginary sides, changing positions every two minutes to ensure each side gets the same amount of heat.
- Open the lid, and place toppings onto the rice. Cover again, and let the toppings steam for another 8 minutes.
- Open the lid, crack in an egg and drizzle lightly with soy sauce. Kill the heat, cover and let steam for about 3 minutes.
- Serve the clay pot on ample insulation if you value your table.
Play by Play

Beef in marinade. Oyster sauce is magic.


I realised as I cut the garnish that they were just the right colour and number for some interesting patterns …

Time for clay pots to take center stage. Lightly oil the insides – see how brightly the kitchen lights are reflecting.

Rice and water, in pre-measured quantities. This was my first attempt at clay pot rice, and I really did want my mis en place ready to go.


Bringing the water to a vigorous boil, then putting the lid on and turning the heat down.


This was the 8 minute mark. Basically all the water is gone, but the rice is still throwing out steam. That’s important, because it’s time for the beef, ginger and chilli to go in. Dump the marinade in too – that will percolate down to the bottom and caramelise.

Giving the clay pots a tilt every now and then. My pots were resting very close to the burner, which means the bottom was getting a lot of heat. This way, the rice on the sides get a chance to develop some crustiness, and the crust on the bottom won’t burn as badly.

8 minutes after the beef went in. I left a little well in the middle when I added the beef, which is where the egg goes in. You can notice there’s still a tinge of pink in the beef, which is great because it will finish cooking when the egg is done. The scallion greens also join the party at this point, because if they get too much heat they wilt and lose their vibrant green colour.

You can see here that the pot in the foreground was done before the one in the background. My two burners run at different strengths, so even though I swapped the pots around the cooking time still varied. This is fine though, because the pot retains heat for a long time so it will stay warm as the other one cooks.

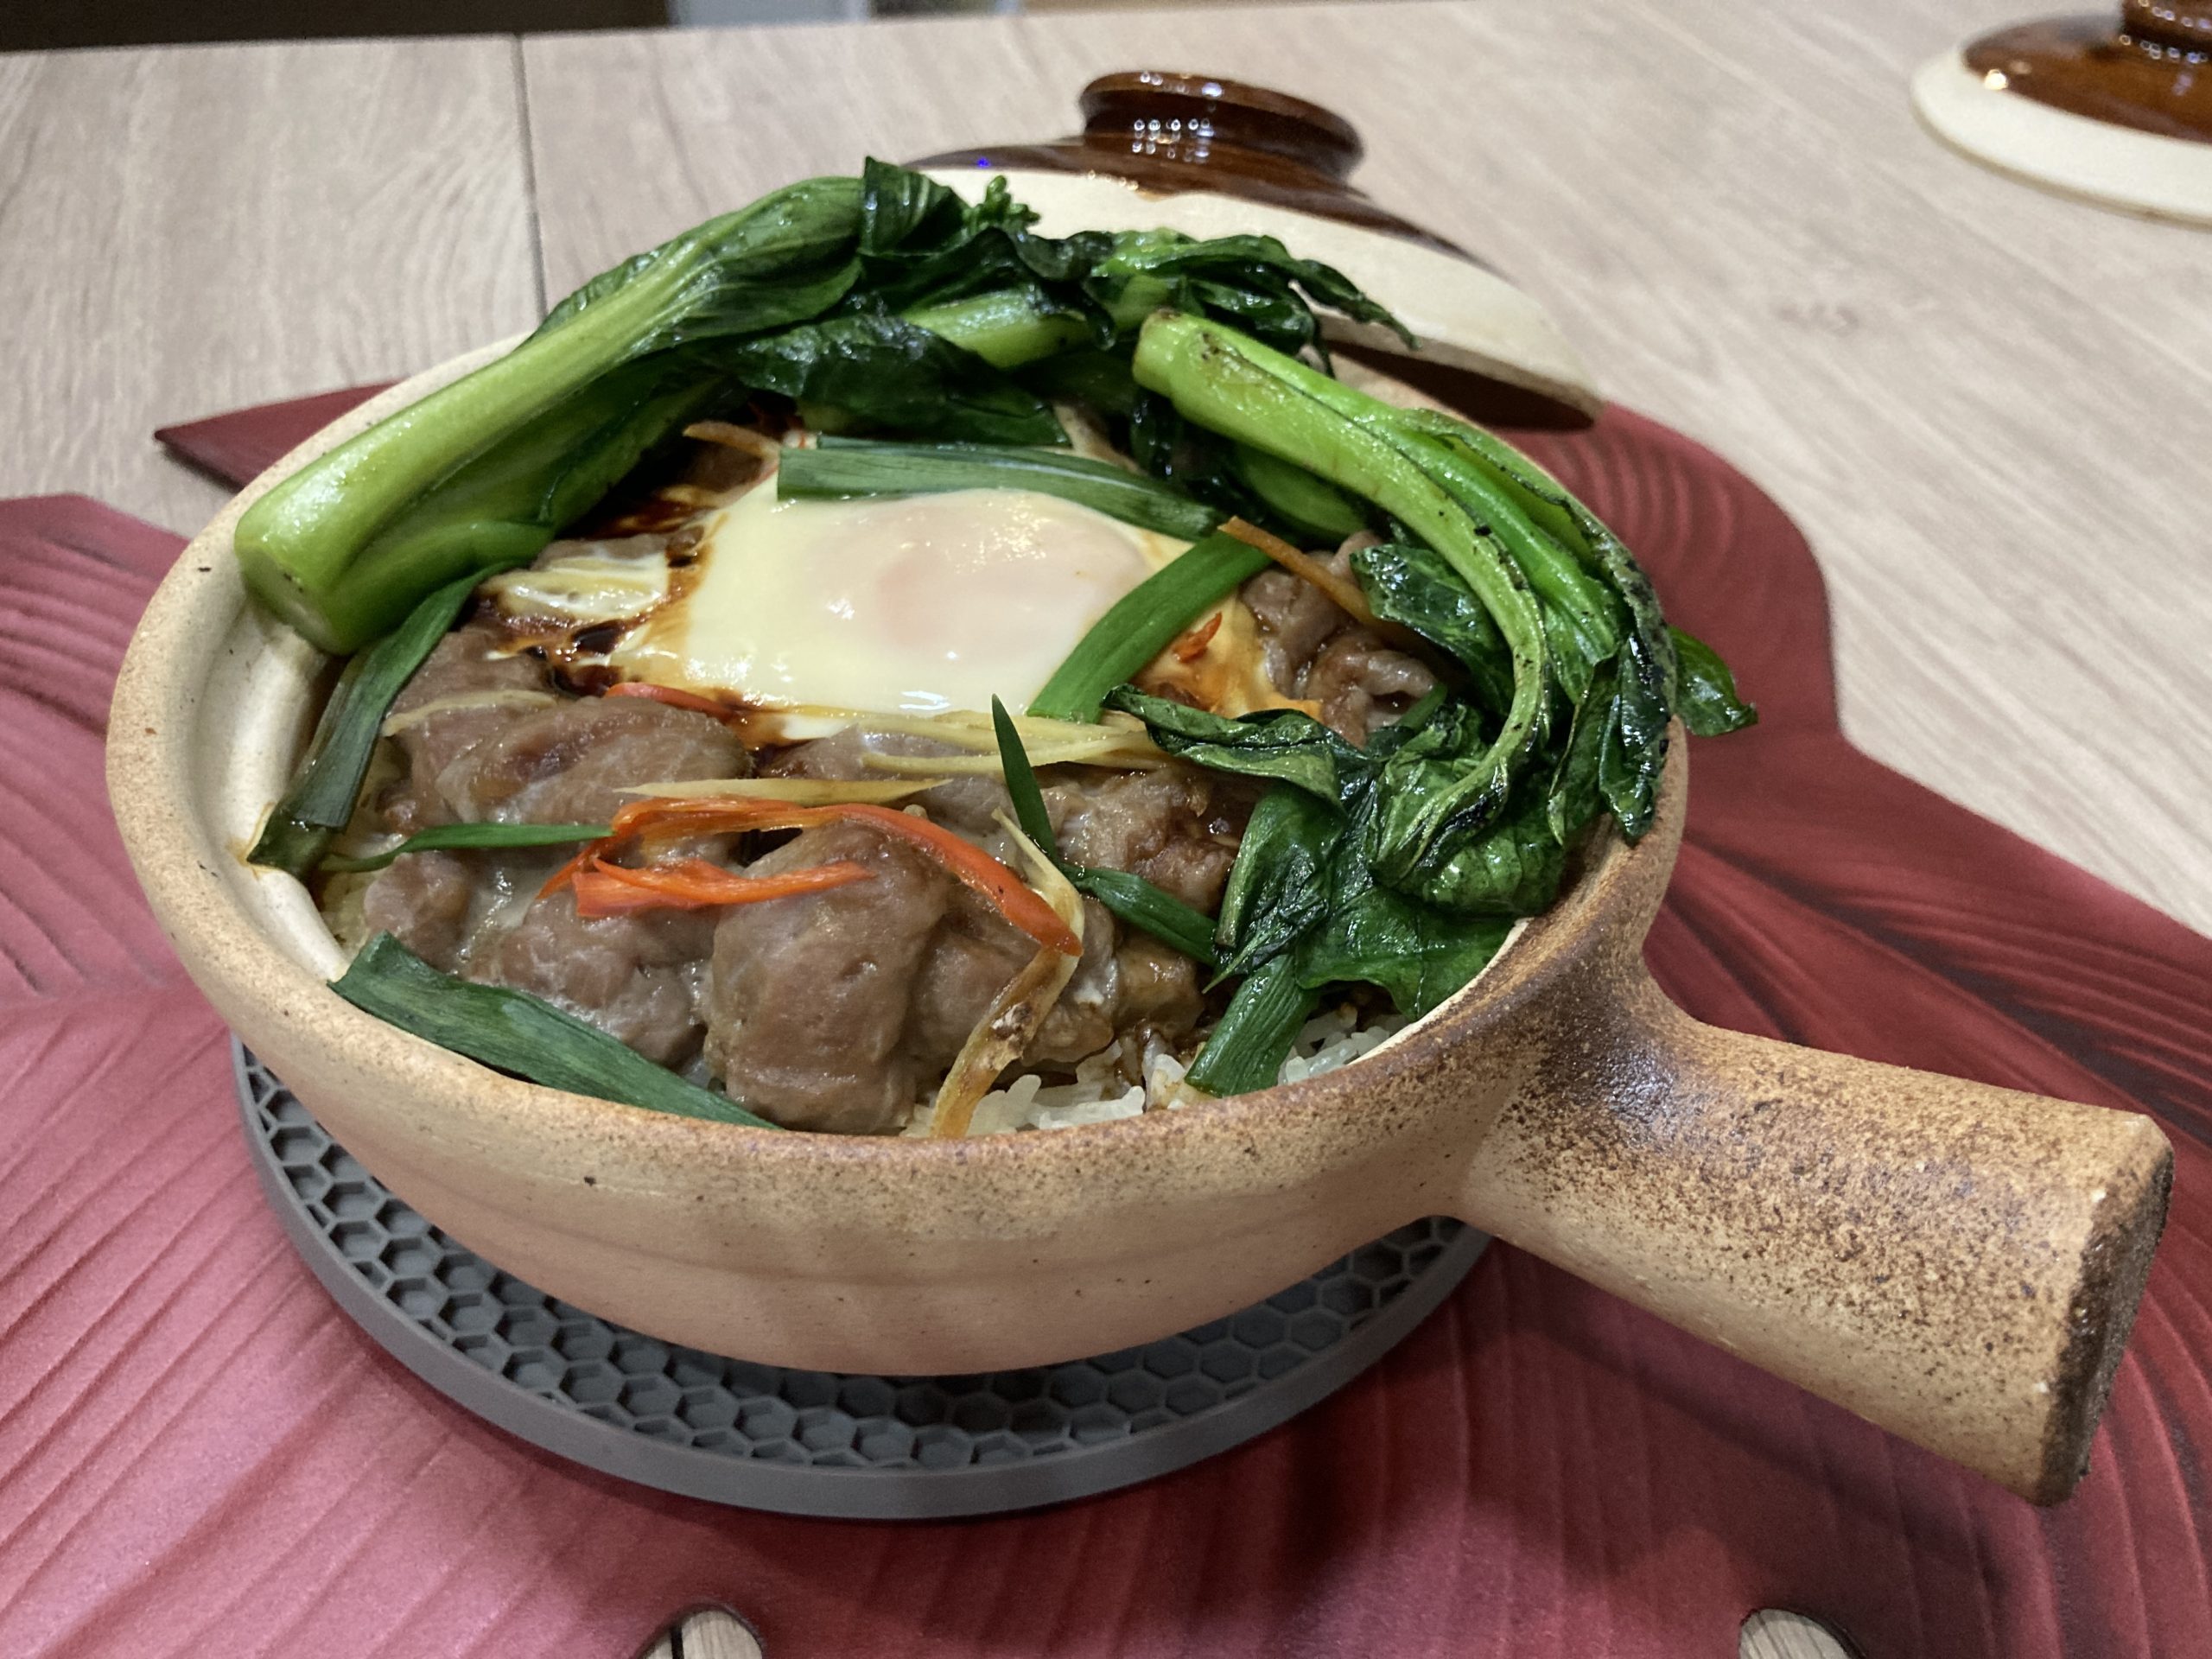
Dinner is served. I tried to cook the choi sum in the same pot, but I had too much stuff inside and the vegetables stopped the pot lid from fitting tightly. Instead, they got stir fried separately and added back to the pot. If your pot has the space, you can totally steam them along with the rest of the ingredients (I’d add them together with the beef)

As you can see, the residual heat from the clay pot really did a number on my heat proof mat. It actually charred my place mat a bit as well. Let this be a warning to let your clay pot cool before serving.

The best part – check out that crispy bottom! The bottom is a bit burnt but the sides are nice and brown. Super satisfying on a chilly evening, 8/10 will make again.

Cantonese Clay Pot Rice with Beef and Egg
Ingredients
- 75 g jasmine rice
- 75 ml water or slightly more
- 100 g sirloin thinly cut and marinated
- 1 tsp oyster sauce
- 1 tsp light soy sauce
- 1 egg
- 1 tbsp dark soy sauce
- Ginger and scallion for garnish julienned
Instructions
- Marinade the beef overnight with oyster sauce and light soy sauce.
- Lightly oil the insides of each clay pot with a paper towel.
- Wash rice, and add to clay pot along with an equivalent volume of water.
- Cover and bring to a boil over high heat. Once water is boiling vigorously, turn the heat down to as low as it will go and cover.
- Set a timer for 8 minutes. Tilt the pot every 2 minutes to ensure each side gets the same amount of heat.
- Open the lid, and place toppings onto the rice. Cover again, and let the toppings steam for another 8 minutes.
- Open the lid, crack in an egg and drizzle lightly with dark soy sauce.
- Kill the heat, add ginger and scallion, cover and let steam for about 3 minutes.
- Serve hot.
Notes


Keep browsing by categories, or by tags:
Beef Blog Broccoli Cabbage Carrots Cast iron Cheese Chicken Curry Dashi Date Night Dried scallops Dried shrimp Eggs Fish and seafood Garlic Ginger Glass noodles Gochujang Honey Miso Napa cabbage Onion Oven Pasta Pork Potatoes Salmon Sesame oil Shiitake mushrooms Shrimp Soup Sous Vide Steaming Stewing Stir fry String beans Sweet potatoes Teriyaki Tofu Tomatoes Vacuum cooker Vegetarian Yogurt Zucchini